 |
| Hello Spring! Materials: My Little Shoebox papers & alphas, Bazzill swiss dotted paper- Fuschia, K & Co pink netting, Liquid Pearls in pink |
 |
| How much do I love the orange glitter alphas? MUCH dude MUCH! |
Here are some close ups:
 |
| Luscious flowers! Bend up the petals and WHAM! instant texture. |
 |
| Had "fun" cutting those itty bitty scallops- will need to practice. |
 |
| Started with red pen but it disappeared into the orange paper so I had to go over it with red marker. |
 |
| Left to right: Yellow zig zag stitch- front of stitch followed by Yellow/pink zig zag stitch- back of stitch usually never seen since it's on the inside of your clothes. |
1. Roughly traced circle and scallop border onto onion skin paper to give general idea of their location.
2. Glued template to the back of the scallop die cut paper
3. Put pink thread in bobbin at bottom of machine and canary yellow in spool on top of machine to get two-tone effect.
4. Using the rough sketch on the onion paper as a guide, I stitched a swirl shape onto the MLS die cut paper using a zig zag stitch so that the BACK of the zig zag stitch (usually hidden in the interior of your clothing) showed on the FRONT of the paper BINGO - instant 2 tone effect!
5. Turned paper over and giggled hysterically at the COOLIO effect.
7. Switched bottom bobbin to canary yellow string.
8. Swirled the FRONT of the zig zag stitch onto the spaces left by previous swirl.
Hope that makes sense- it's just a fun little tweak on the usual.
*Thank you Mary from the Scrapbook.com forum for helping me with proper sewing terminology for this itty bitty tute!
Here's the page again in larger format (and away from all my blogger template madness):
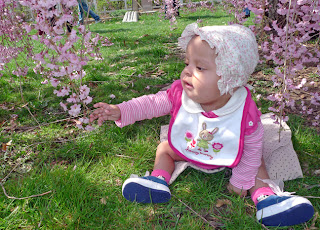
Required Miss Lola shot:
MuChOs SmOoChEs!
M.


Fabulous stitching technique, and a beautiful, cheerful, Spring LO!
ReplyDeleteGirl, love this layout. Screams spring. And Lola is an absolute doll. Thanks for all the inspo and tutorial.
ReplyDeleteWOW!! Amazing!
ReplyDeleteGORgeous! All the texture, and bright happy, hopefull attitude of spring here. LOVE it! You rocked that MLS, Girl! Great tutorial BTW! :)
ReplyDeleteSuper cute layout! I love the colors, the stitching and all the fussy cutting/layering of the flowers. Beautiful work!
ReplyDeletewow, so many beautiful details!!! love it!!!!
ReplyDeletei am digging all the details!1
ReplyDeletefabulous springy page! i can feel it! am impressed by the stitching patience shown too. great page!
ReplyDeleteSo fun! Love the stitching on your page!!!! So cool that you live in NYC!!! It's beautiful here too in Rochester. My dog is loving it. Thanks for the blog love! xoxo
ReplyDeletehello awesome!!!!!
ReplyDeletethis just made my morning fabulouuuuuuussss!!!
=)
I love all these details!
ReplyDeleteSO FLIPPIN AWESOME!!! Can I be like you when I grow up?
ReplyDeleteSerious wow! This layout is phenomenal! I linked it up on Practical Scrappers!
ReplyDeleteWhat a beautiful spring layout! Your stitching is fab and Lola is pure cuteness! Thanks for playing along Michelle, your work is beautiful!
ReplyDeletegosh! that is such an intricate stitch work! amazing! :)
ReplyDeleteMichelle!!! This is gorgeous!! I love all the stitching and the fussy cut flowers!!!
ReplyDeleteI love the stitching
ReplyDeleteThis is gorgeous - I love how you have used the negative space from the letters and that stitching just ROCKS!!
ReplyDeleteSo colourful!! Love the layers, the lettering, and that's so interesting the machine stitching, really nice!
ReplyDeleteThis is such a fabulous project - thanks so much fpr letting me feature it over at TipJunkie!
ReplyDeleteLowri
http://www.tipjunkie.com/papercraft-tutorials/